Transfer Photos and Videos from iPhone to PC or Mac
This guide shows how to transfer photos and videos from your iPhone to a PC or Mac using TouchCopy.
TouchCopy lets you browse, preview and save media from your iPhone, iPad or iPod to your computer. You can copy selected photos and videos, export only new items for regular backups, and save your media to a folder on your computer or external drive.
Run TouchCopy and connect your iPhone using a USB cable or Wi-Fi.
In the "Photos" feature, select the photos and videos you'd like to save. You can select all media by using Ctrl+A or Cmd+A keyboard shortcut.
Click "Save to PC" or "Copy to Mac" (), and select a location on your computer to save your media to.
TouchCopy can save Camera Roll photos and videos, saved movies, Live Photos, screenshots, selfies, albums and other media stored in your iPhone Photos library.
TouchCopy maintains your iPhone's album structure by saving each album as its own folder (e.g. “Camera Roll”, “WhatsApp”, or “Summer Holiday”). You can turn this off in Settings if you don't want separate album folders.
If you want to copy your iPhone pictures directly into the Photos app on your Mac, select an Album, Event or selection of photos and click "Copy to Photos" () button in the TouchCopy photos toolbar. If you leave the selection blank, all of the pictures will be copied into the Photos app.
How TouchCopy Handles Different Photo Formats
TouchCopy saves your photos in the same quality as they are stored on your device. It can transfer images and videos in all popular formats, from JPEG, .HEIC, animated GIFs and even Apple ProRaw photos! ProRaw photos are saved in a .DNG format, without modifying or converting the file.
Live Photos can be saved as a video, a still image, or both.
Watch Our Video Tutorial
See how easy it is to transfer your iPhone photos and videos to your computer with TouchCopy:
View full-size photos in TouchCopy
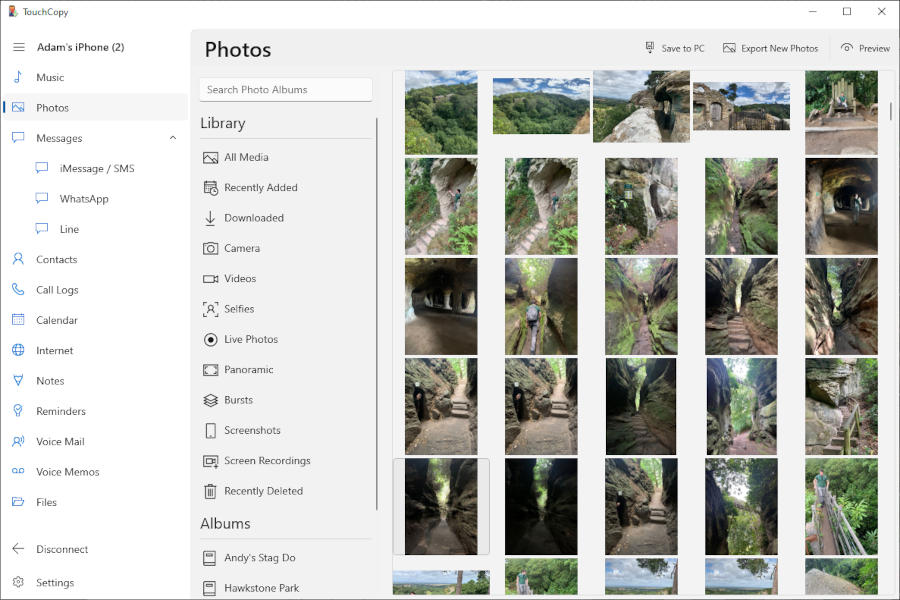
If you're not sure which photos to copy from the thumbnails in TouchCopy, you can preview your media in full-size before saving it to your computer. To view a list of the media on your iOS device click the "Photos" button in the category list.
TouchCopy lists all your photo Albums (folders) and Events on a list on the left. Clicking on one of these items will display all the items contained within that group.
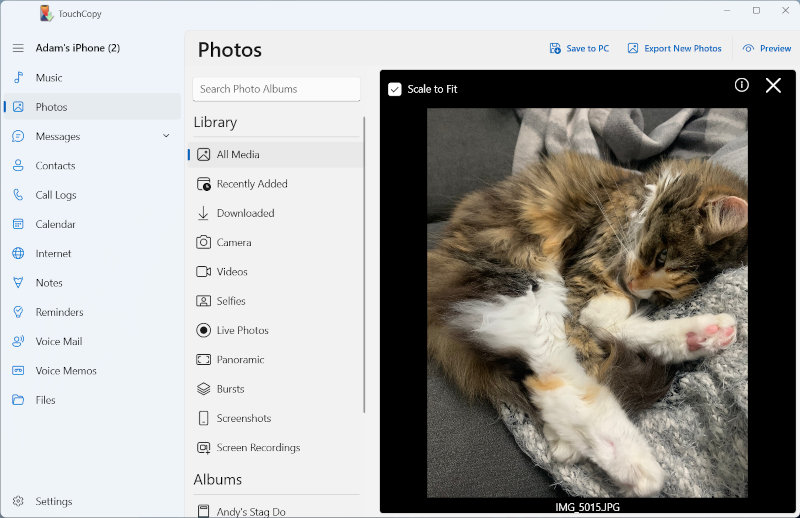
To view a large version of any image, you can either...
Double-click the photo entry in the photo list.
Select a photo and click the "Preview" () button on the Photo toolbar.
To return to the thumbnail views, click the "X" button in the top-right of the TouchCopy Photos window.
You can also preview videos in TouchCopy before copying them. Note that video playback depends on your computer's supported formats. For example, you can preview MOV files on a Mac, but they may not play natively on a Windows PC without additional codecs or software.
You can also set your iOS device pictures as your Desktop Wallpaper. Simply, select one photo to copy to your Desktop on your Mac - click the "Set Desktop Image" () button on the Photo toolbar. TouchCopy will ask you how you would like to size the picture to your desktop. Make a selection and then click "OK".
How to Export New Photos and Videos from iPhone to Computer
The Export New Photos feature in TouchCopy is ideal for making regular backups of your iPhone media library. If you'd like to back up your videos too, enable this in TouchCopy's Settings > Photos > "Include videos in export".
With this feature, you'll designate a folder on your computer to be your photos backup folder. Then, TouchCopy intelligently lets you know which pictures and videos you need to back up (media on your iPhone which you've not yet copied to your folder).
This is great because it prevents duplicating photos that you've backed up before. Let's see how to do it...
Launch TouchCopy and connect your iPhone, iPad or iPod.
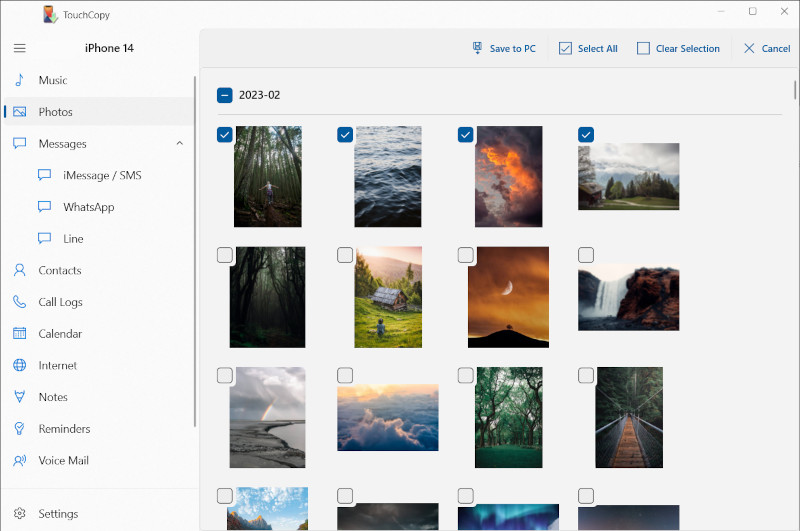
In the photos section, click "Export New Photos" ().
Click Browse, then select or create a folder where you want to store your device photos.
Select the photos you wish to export (using the checkboxes on each photo or date, or the "Select All" button)
Click "Save to PC" or "Copy to Mac" ().
Now, whenever you connect your iPhone to TouchCopy and access Photos, TouchCopy will detect any new photos you have on your iPhone and ask if you'd like to back them up to your designated folder!
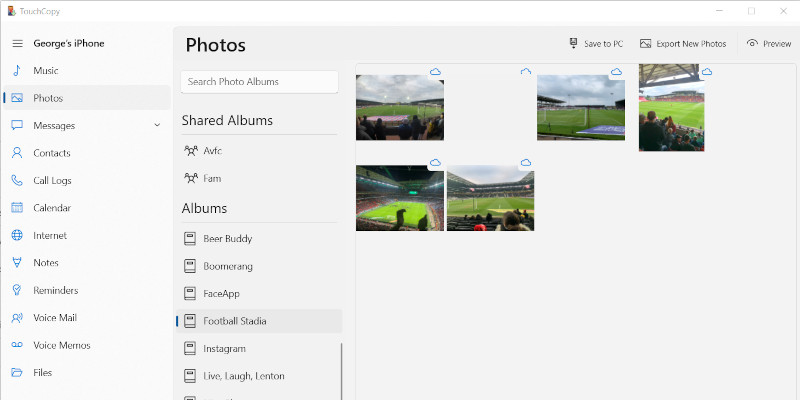
Copying Photos Stored in iCloud
TouchCopy will display photos stored in iCloud with a cloud icon. You can filter out these photos, so they are not displayed in TouchCopy, by viewing the "Downloaded" report in TouchCopy Photos.
As iCloud photos are not stored locally on your device, TouchCopy is unable to copy them to your computer unless you download them to your device first. You can quickly download an individual iCloud photo to your iPhone by viewing it at full resolution on the device.
To download all iCloud photos to your iPhone, follow these steps:
Open the "Settings" app on your iPhone.
Tap your account that is displayed at the top of the settings list.
Tap "iCloud" and then "Photos".
Select "Download and Keep Originals".
You will need sufficient space on your iPhone to save all your iCloud photos. Once all your photos have been downloaded to your device, copy them to your computer using TouchCopy.
How to Copy Photos and Videos from Computer to Your iPhone
After backing up your photos and videos to your computer with TouchCopy, you can add them to a new or existing iPhone by syncing them with the Apple Devices app, iTunes (Windows), or Finder (Mac).
Important: Syncing will replace all photos and videos currently on your iPhone with the media stored in the selected folder on your computer. To avoid losing anything, make sure you've saved all your photos and videos using TouchCopy before you sync.
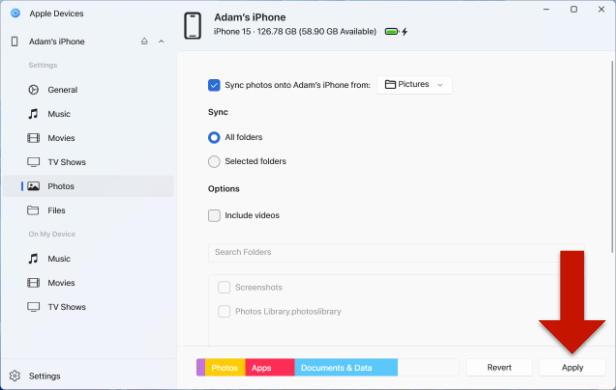
Sync Photos from Windows PC to iPhone
Open iTunes or the Apple Devices app on your PC.
Connect your iPhone using a USB cable.
If you're using iTunes, click the small iPhone icon when it appears.
Select "Photos" from the sidebar.
Tick "Sync Photos" and choose the folder that contains your photos and videos.
Select "Include Videos" if you want to sync videos as well.
Click "Apply" and then "Sync".
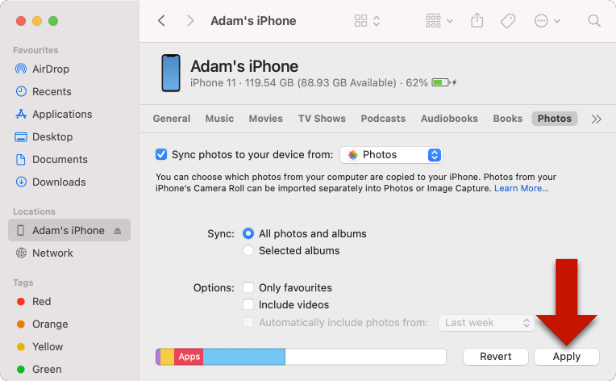
Sync Photos from Mac to iPhone
Open Finder on your Mac.
Connect your iPhone using a USB cable.
Select your iPhone under "Locations" in the sidebar.
Click the "Photos" tab at the top of the window.
Tick "Sync Photos to your device from" and choose the folder containing your media.
We use cookies to provide you the best experience on our website. To find out more, read our cookie policy. You may decline non-essential cookies if you prefer.
We use cookies to track usage and optimize your experience.
 ), and select a location on your computer to save your media to.