How to transfer photos from Android to computer
- Download Droid Transfer.
- Connect your Android device and your PC using a Wi-Fi or USB connection.
- Open the "Photos" tab from the feature list.
- Click "Save to PC".
- Tell Droid Transfer where to save the photos to on your PC.
Detailed Information
You can use Droid Transfer to quickly and easily copy photos from your phone to your computer.
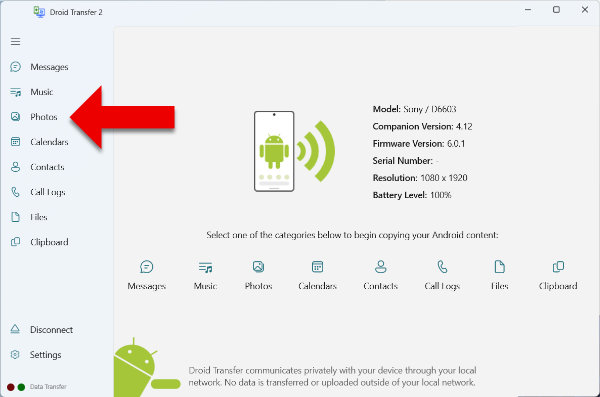
First of all, connect your Android device to Droid Transfer on your PC.
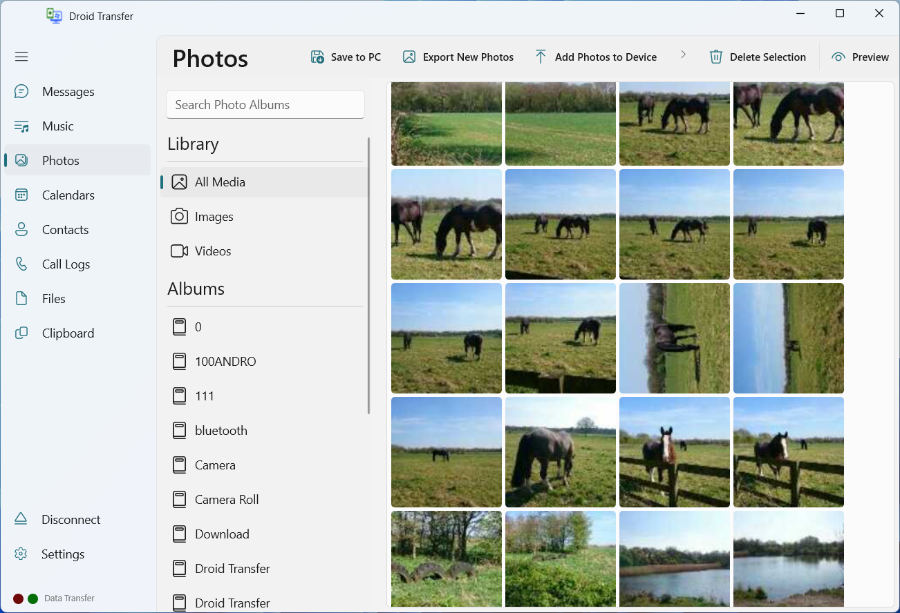
Next, open the "Photos" feature header in Droid Transfer to display the photos stored on your Android device.
To copy all your Android device photos to your PC, click "Save to PC" without any photos selected, or select all photos by using "Ctrl+A" keyboard shortcut.
You can also select the photos that you wish to copy using your mouse. Hold down the "Ctrl" or "Shift" key on your keyboard while clicking on photos in Droid Transfer to select groups of photos, then click "Save to PC" to transfer selected photos to your PC.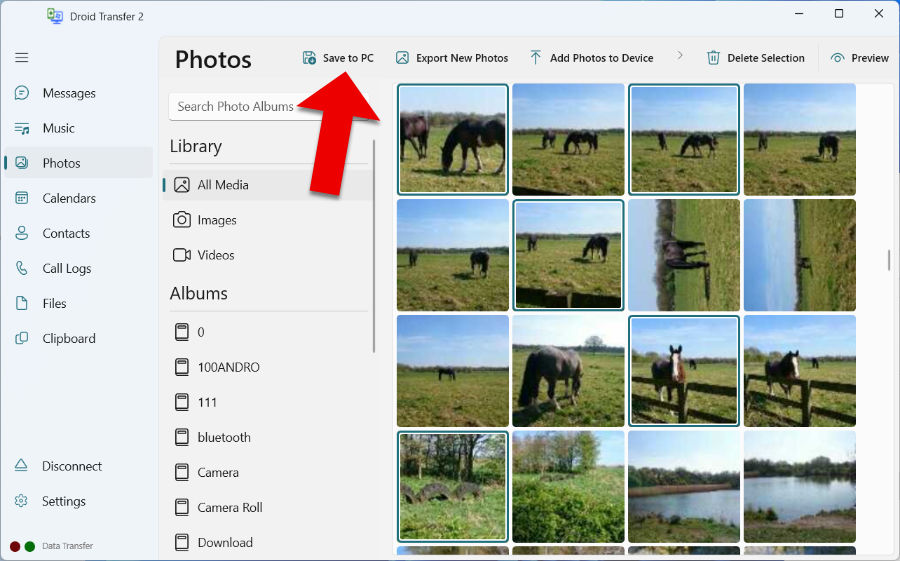
Choose where to save the images on your computer, then click "Select folder" to begin the transfer.
Droid Transfer will copy your photos in the same quality as they are stored on your device. You can copy all kinds of image formats, from JPEG, PNG and .HEIC (How to view HEIC formatted photos on your computer). Droid Transfer will copy RAW photos in a .DNG format, without modifying or converting the file.