How to Transfer Photos and Music from iPhone to External Hard Drive
Summary
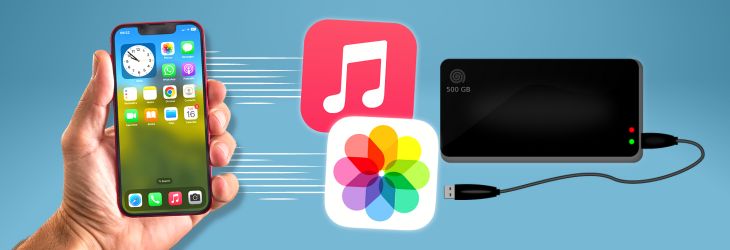
As photos, videos, and music continue to grow in quality, they can quickly fill up your iPhone’s storage. You can free up space by transferring your media to an external drive, then safely delete what you no longer need from your device.
Quick jump to:
Transfer iPhone Media to External Hard Drive with TouchCopy
TouchCopy is a powerful app for Windows and Mac that lets you browse your iPhone on your computer and copy whatever you need.
In this guide, we’ll show you how to back up photos and music to an external hard drive. You can also use TouchCopy to save contacts, calendars, notes, and more.
Download TouchCopy on your PC or Mac to get started:


Back Up iPhone Photos to External Storage
- Install and open TouchCopy on your computer.
- Connect your iPhone via USB or Wi-Fi.
- Connect your external drive to the computer.
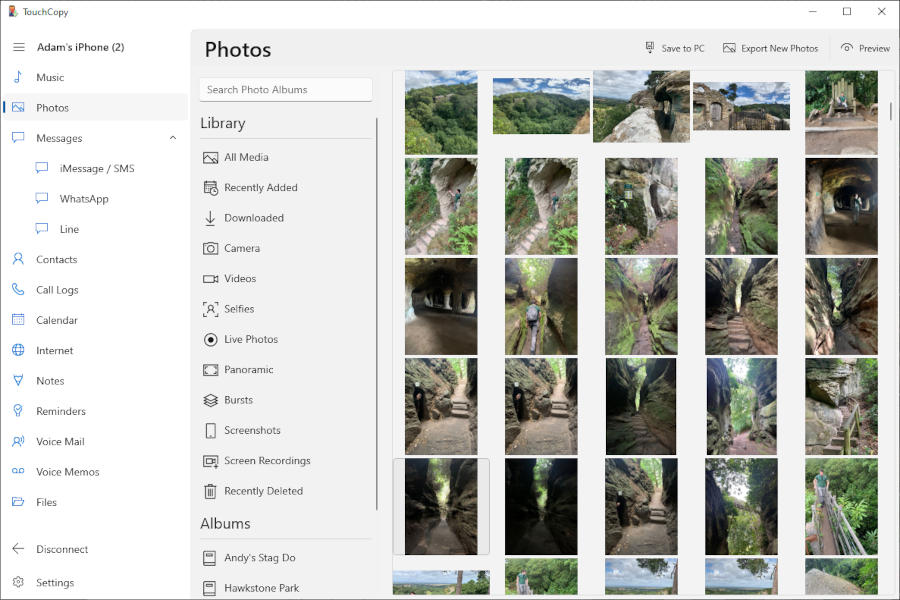
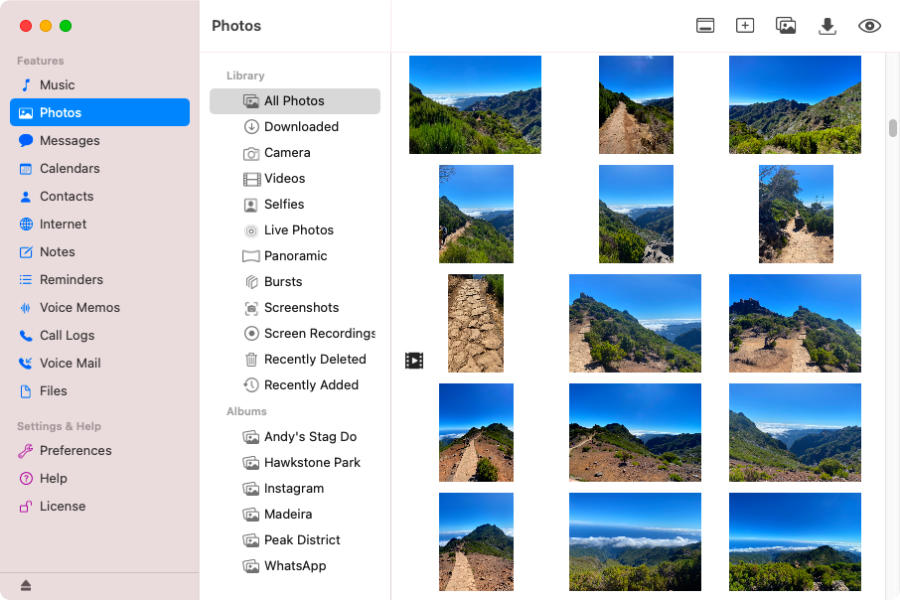
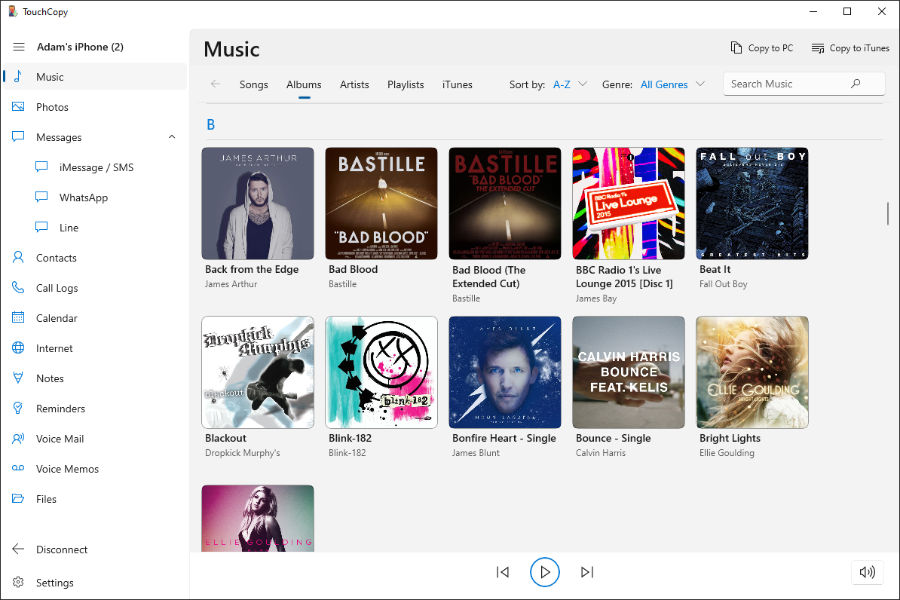
- In TouchCopy, go to the Photos feature.
- Select the photos you wish to back up.
- Click Save to PC or Copy to Mac.
- Choose a folder on your external hard drive and click OK.
With TouchCopy, you can back up your iPhone photos to any drive connected to your computer — including external hard drives, SD cards, and even network-attached storage.
Create Differential Backups of iPhone Photos to External Storage
To back up only new iPhone photos to your external drive with TouchCopy, follow the steps below:
- Open TouchCopy on your computer and connect your iPhone.
- Connect your external drive to the computer.
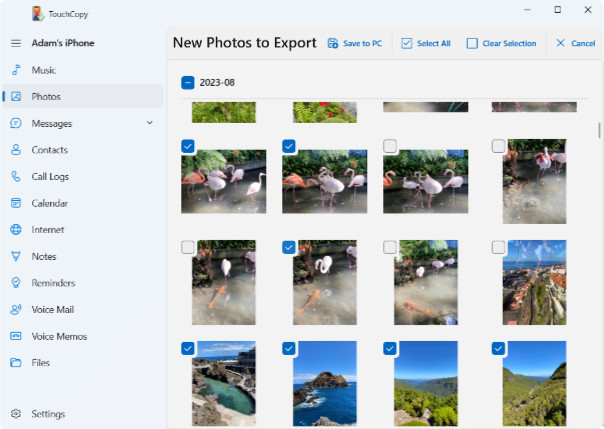
- In Photos, click Export New Photos (or the icon on Mac).
- When prompted, click Browse and create/select a folder on your external drive.
- TouchCopy will compare your iPhone photos with those already saved, showing only the new ones.
- Select individual photos or click Select All, then choose Save to PC / Save to Mac.
- Confirm your destination folder and click OK.
Now your external drive will contain only the latest photos without duplicating the old ones — perfect for keeping backups up to date.
Back Up iPhone Music to External Storage
- Install and open TouchCopy on your PC or Mac.
- Connect your iPhone to the computer with a USB cable or via Wi-Fi.
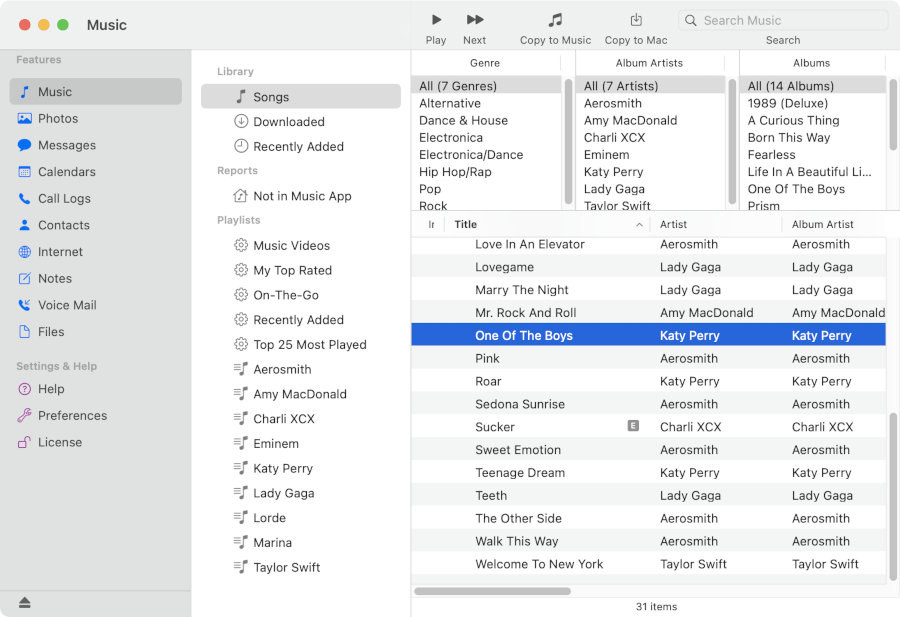
- In TouchCopy, go to the Music section.
- Select the songs you want to back up.
- Click Copy to PC or Copy to Mac.
- Choose your external hard drive as the save location, then click OK.
For more details on copying your music, playlists, podcasts, and other audio content from your iPod or iPhone, refer to the TouchCopy user guide.
After transferring your music to your external drive, you may wish to add it to your iTunes library for easy access. Check out our guide for how to restore your backed up music to iTunes.
Transfer iPhone Photos to External Drive Without a Computer
If you don’t have a computer, you can connect an external drive directly to your iPhone (with the right adaptor) and copy photos. Note: This method works for photos, but not for music or many other file types. For a full backup, use TouchCopy.
- Connect your external drive to your iPhone using the appropriate adaptor.
- You may get a prompt on your iPhone to Trust the connected drive. Tap Trust.
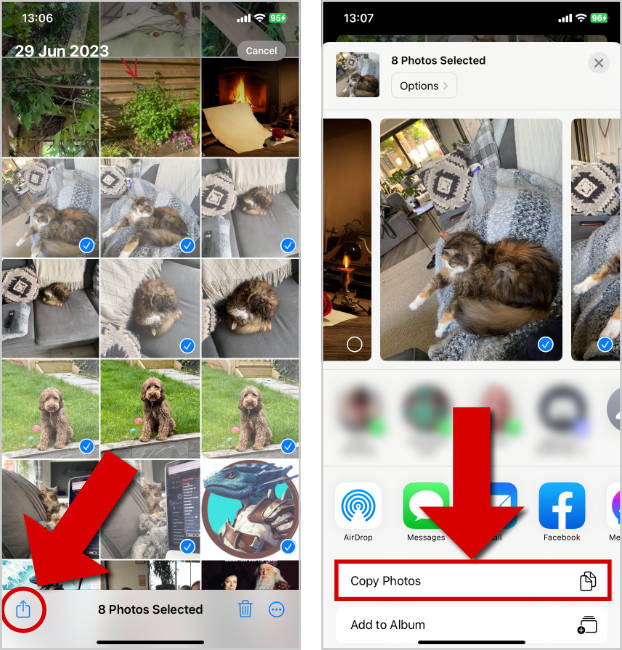
- Open the Photos app on your iPhone.
- Tap Select, then tap all the photos you want to copy.
- Tap the Share icon, then choose Copy Photos.
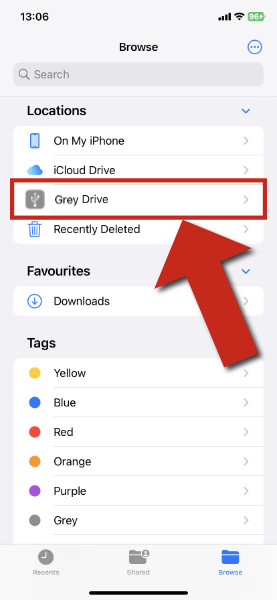
- Now you can open the Files app on your iPhone and navigate to your connected external drive. Tap Browse at the bottom of your screen. The drive will be listed under Locations.
- When viewing the folder on your external drive you wish to save your photos to, long press inside the folder, then tap Paste.
Conclusion
There are several ways to transfer media from your iPhone to an external drive. By moving photos, videos, and music off your device, you can clear valuable space on your iPhone and keep your device safely backed up.
If you don’t have the adaptors or drives needed to connect directly to your iPhone, TouchCopy is the easiest solution. With TouchCopy, you can copy not only photos and music but also messages, contacts, call history, calendars, notes, bookmarks, voicemail, voice memos, and more — all directly to your computer or external drive. Try TouchCopy free today and take full control of your iPhone content.
Popular FAQs
- Transferring Photos from iPhone to Laptop: A Guide for PC and Mac
- How to Transfer Video from iPhone to PC
- How to Transfer Photos from iPhone Messages to Computer
- How to Fix Photos Not Showing in Messages
- How to View HEIC Formatted Photos
- How to Convert iPhone HEIC images to JPG
- Backing Up ProRaw Photos on iPhone Pro Models
- How to Delete All Photos From iPhone at Once
- How to Transfer Photos from iPhone to Android