Running out of disk space on your Mac can make it slow, cause apps to fail, and prevent you saving new files.
The biggest culprits are large files, duplicate data, unused apps, and system files building up over time.
Let's see the 10 most effective ways to free up space and get things running smoothly again.
- How to check Storage on Mac or MacBook
- Mac OS Storage Management
- Find Duplicate Files Mac
- Remove Unused Apps on Mac
- How to Delete Downloads on Mac
- Find and Remove Large Media Files
- Delete Old iPhone & iPad Backup
- Delete Temporary Files on Mac
- Taking out the Trash
- Move files into external storage
1. How to Check Storage on Mac
To see how much space is available on your Mac:
- Click the Apple icon in the top-left corner of your screen.
- Select System Settings > General.
- Under "Storage", click "Storage Settings...".
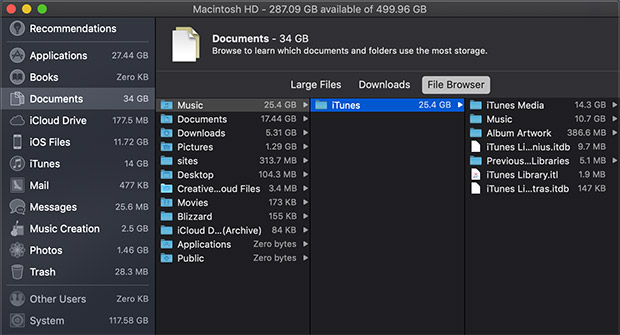
This screen shows how your storage is being used, along with how much space is available.
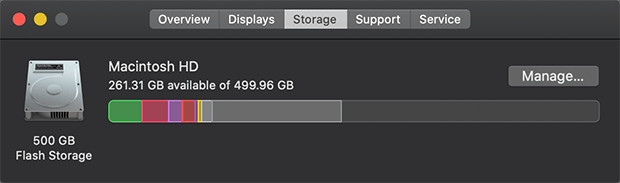
If you hover over each section of the bar, you can see what's taking up space. Categories like Applications, Music, Photos, Messages and Mail are easy to understand, but you'll' also notice a grey section labelled System Data (or “Other”).
This can often take up a lot of space. It includes files that don't fit into other categories, such as cached and temporary files, app installers, and local backups. We'll cover all these items and more in the following sections.
2. Use macOS Storage Management
A perfect place to start claiming back space is to use the built-in tools that macOS provides. You can access them from the Storage screen you just opened.
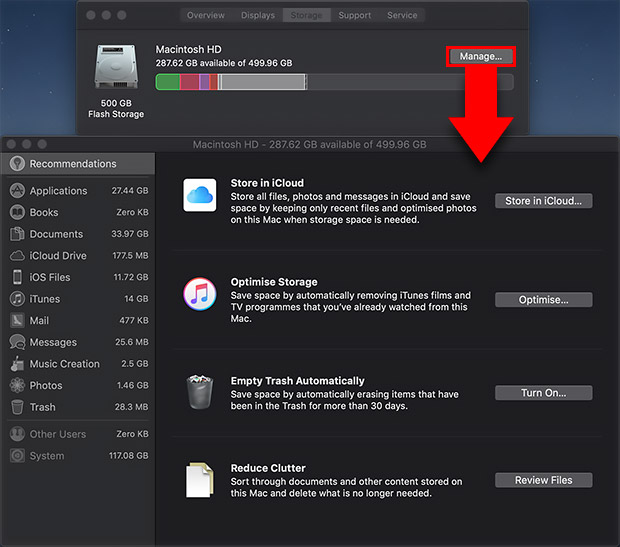
These tools help you find and remove unneeded files, or move ones you do need elsewhere to free up space.
-
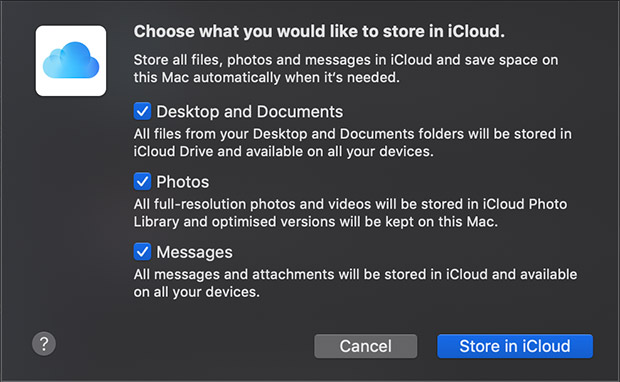
Store in iCloud: Move files like Documents, Photos, and Messages from your Mac to your iCloud account.
Enabling this option allows your Mac to automatically offload files to iCloud when storage space is needed.
This is useful if you want to keep your files but you don't need them saved physically on your Mac. You can access your iCloud files from any device that uses your Apple ID. Keep in mind that you may need to upgrade your iCloud storage if you have a lot of data, as you only get 5GB free.
-
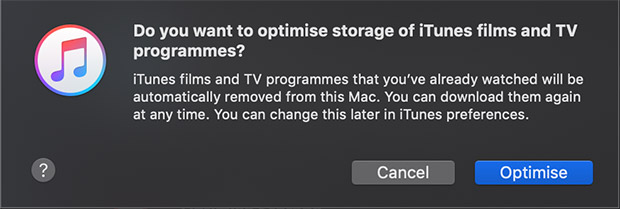
Optimize Storage: Automatically removes saved movies and TV shows that you've already watched.
If you download and watch a lot of video content, this feature can save you loads of time, effort, and of course storage space.
Video files can be huge, depending on their duration and quality, so deleting ones you don't need any more can be a huge quick win.
-
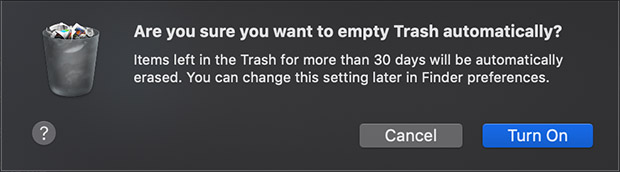
Empty Trash Automatically: Deletes items from your Trash after 30 days.
Manually emptying the Trash is a chore we often forget to do, but this feature helps keep your storage clear by automatically doing it for you. Note that once files are removed, they can't be recovered, so ensure you've backed up any important data before enabling this feature.
-
Reduce Clutter: Find and remove large or unused files to free up space.
Older versions of macOS (pre macOS 13 Ventura) included tools to find large or unused files. You can still achieve this manually by sorting files by size or using the Downloads folder.
Tip: The built-in tools are a good starting point, but they won't catch everything — especially duplicate or hidden files.
3. Find Duplicate Files Mac
Perhaps the worst type of clutter on your Mac is duplicate files. You may not need these files, and worse still, you have two or more copies of them!
Without realizing it, you can amass gigabytes worth of duplicate files and folders on your computer.
The problem is that finding and comparing duplicates manually can take hours, especially if they're spread across different folders.
Tools like Duplicate Sweeper make this process easier by quickly scanning for duplicates on your computer and showing you what you can remove.
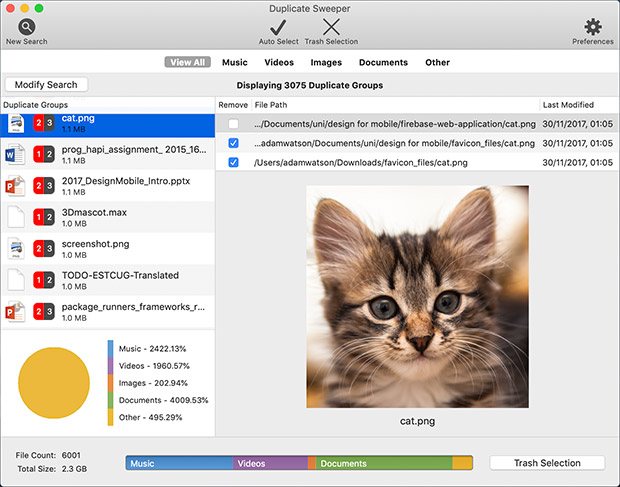
Duplicate Sweeper lets you find and delete duplicate files, photos, and music in just a few clicks. You can choose which versions to keep — for example, the newest or highest quality — and remove the rest automatically.
What duplicates can you find and remove with Duplicate Sweeper?
In the example below, over 6,000 duplicate files were removed in a single scan, freeing up 2.3GB of space. Doing this manually would take a huge amount of time.
Watch the video below to see how to remove duplicate photos on your Mac
4. Remove Unused Apps on Mac
One of the biggest areas you should consider when looking at how to free up space on Mac is your Apps. Maybe unsurprisingly, apps on your Mac can be some of the largest files on your computer. Removing the ones you don't use can clear huge amounts of storage.
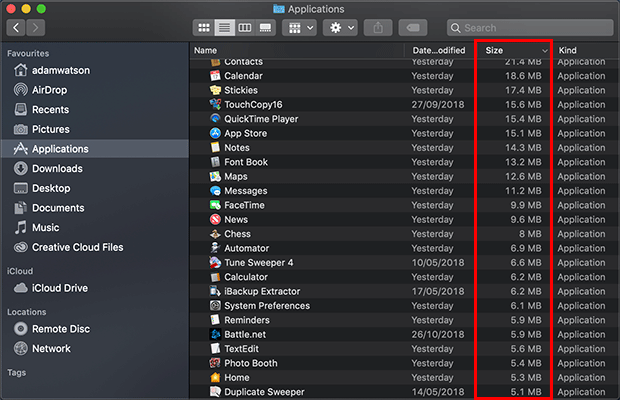
To find the largest apps on your Mac:
- Open Finder and go to Applications
- Switch to list view (the icon with three lines)
- Click the Size column to sort apps by size
You can then review the list and remove anything you don't need by dragging it to the Trash.
Remember that you'll need to empty your Trash to completely remove the applications from your Mac.
Tip: Large apps like video editors or games often take up the most space.
5. How to Delete Downloads on Mac
Your "Downloads" folder can be a major source of clutter, as it fills up with files you may have only needed once.
It's also a major area to check for duplicate files, as it's easy to download something that you've already downloaded.
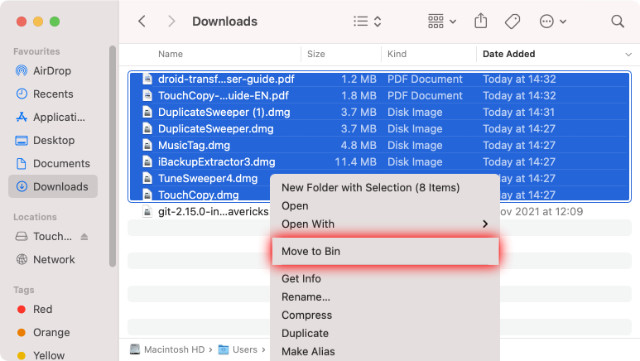
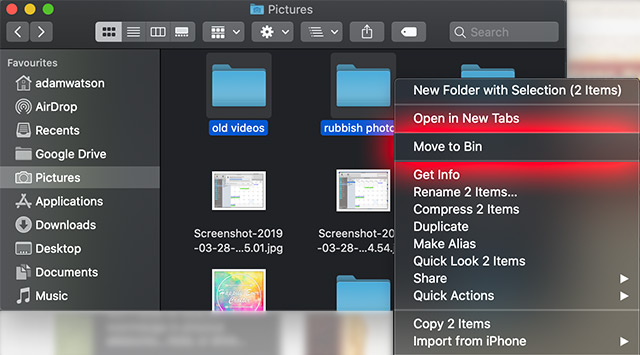
- Open Finder and go to Downloads
- Select the files you want to remove (press Cmd + A to select all)
- Right-click and choose "Move to Trash" or "Move to Bin"
Your selected files aren't fully deleted yet. To delete the files and reclaim your space, you'll need to empty your Trash/Bin.
Tip: Installer files (such as .dmg or .pkg files) can usually be deleted once the app is installed, as they're no longer needed.
6. Find and Remove Large Media Files
Due to the ever-improving quality of media like photo and video, they're often some of the largest items on your Mac.
So, your media folders can be a great place to free up some of that precious storage on your Mac.
- Open Finder
- Go to your Pictures, Movies, or Music folders
- Sort files by size to find the largest items
- Delete anything you no longer need
Remember to clear the Trash to permanently delete the files. If you prefer to delete this media from the associated apps like Photos and iMovie, see how to empty their trash.
Extra: Zipped / Archived files
When you open a .zip file, your Mac creates an uncompressed copy but keeps the original zip file. If you've already extracted it, you can usually delete the .zip file.
On the flip side, you can use file archiving to compress files or folders that you don't use regularly.
Right-click a file or folder in Finder and select Compress to create a smaller .zip version.
Don't forget to delete the original, uncompressed folder after archiving.
7. Delete Old iPhone & iPad Backups
Backups of your iPhone or iPad can be huge - especially if the device contains lots of photos, videos, messages etc.
While backups are useful for restoring to a device, you may not need to keep historic ones, or ones from devices you no longer own.
To delete old backups from your Mac:
- Open Finder
- Connect your iPhone or iPad
- Select your device under Locations
- Click "Manage Backups"
- Select a backup and click "Delete Backup"
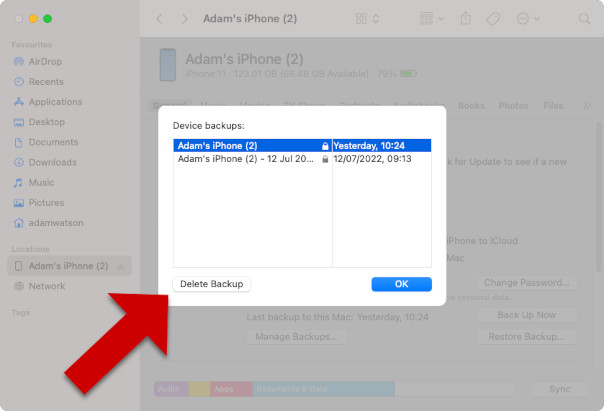
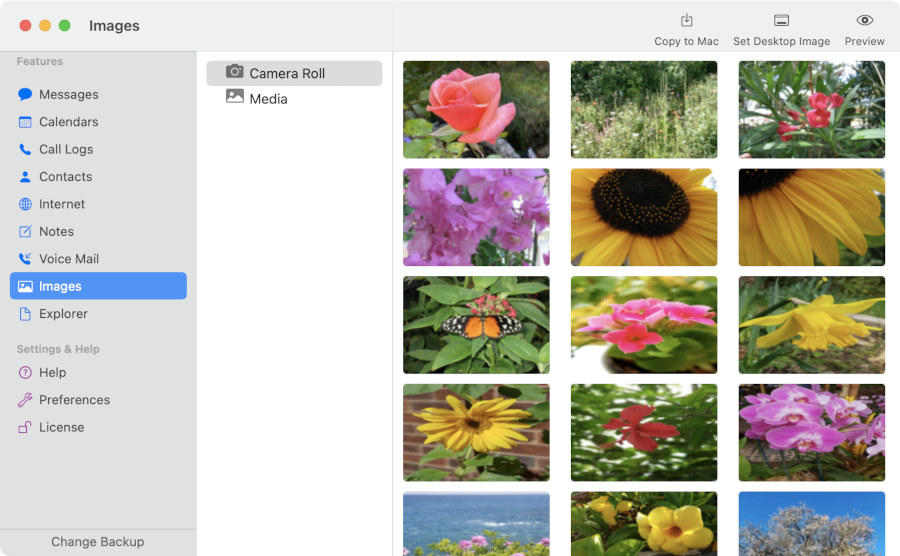
If you need certain data from a backup, tools like iBackup Extractor let you browse and extract files such as photos and messages before deleting the backup.
Tip: Going forward, you might consider using iCloud instead to save space on your Mac. Find out how to back up your iPhone or iPad to iCloud.
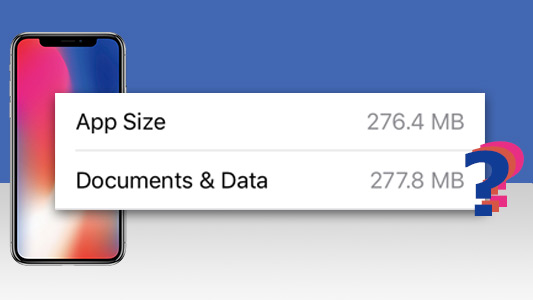
8. Delete Cache and Temporary Files on Mac
Cache and temporary files are stored to help apps and websites load faster, but over time they can build up and take up unnecessary space.
Since those programs don't clear their own cache, you have to do it manually.
To clear cache files on your Mac:
- Open Finder
- Click Go in the menu bar
- Hold the Option key and select Library
- Open the Caches folder
- Delete any files or folders you no longer need
It's usually safe to delete cache files, but avoid removing files from folders you don't recognize.
Note: This method clears system and app cache files. Browser data such as cookies and website data need to be cleared within your browser settings.
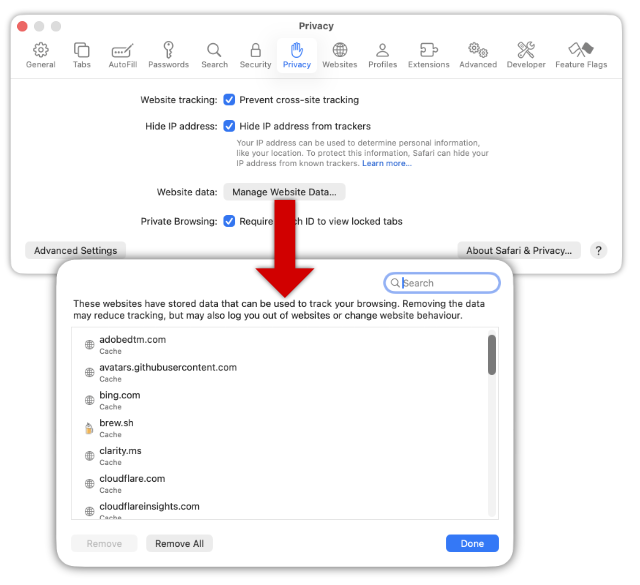
To clear Safari cache and cookies:
- Open Safari
- Go to Settings > Privacy
- Click Manage Website Data > Remove All
9. Taking out the Trash
Deleting files on your Mac usually only moves them to your Trash Can (or Bin).
This is great, because if you "delete" something by accident, you can restore it to its original location - no harm done.
However, it also means they still take up storage space until the Trash is emptied.
To permanently delete these files:
- Click the Trash icon in your Dock
- Review and restore any files if needed
- Click "Empty" to remove everything

Deleting files from apps like Photos, iMovie, and Mail
Some apps have their own “trash” or “recently deleted” section. Files removed within these apps may stay there for a period of time before being permanently deleted.
For example, in the Photos app:
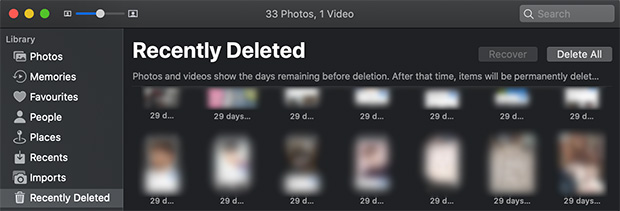
Open the Recently Deleted section to view removed items. These are kept for up to 40 days unless you delete them manually.
To free up space immediately, click Delete All.
Other apps like iMovie and Mail use similar systems, so it's worth checking their trash folders too.
10. Move Files to External Storage
Not everything needs to be deleted. If you want to keep your files but still free up space, moving them to external storage is a good option.
External drives are relatively cheap and easy to use.
Simply connect the drive to your Mac using a USB cable. It will appear as a Location in Finder as shown below:

You can then drag and drop files onto the drive, or move folders across to free up space on your Mac.
Tip: External drives are ideal for storing large files like videos, backups, or old projects that you don't need every day.
Key Takeaways
If your Mac is running out of space, start by removing large or unnecessary files, then look at apps, duplicates, downloads and cached data.
If you still need more space, moving files to external storage or cloud storage can make a big difference.
With a few simple steps, you can free up space and make your Mac run smoothly again.
Happy spring cleaning!
Want more tech tips like this?
Add us as a Preferred Source on Google.