How do I search for duplicate files on my External Hard Drive?
Summary
To search for duplicate files on your external hard drive, follow these steps...
- Download, install and launch Duplicate Sweeper.
- Open Preferences and set a folder to move your duplicate files to.
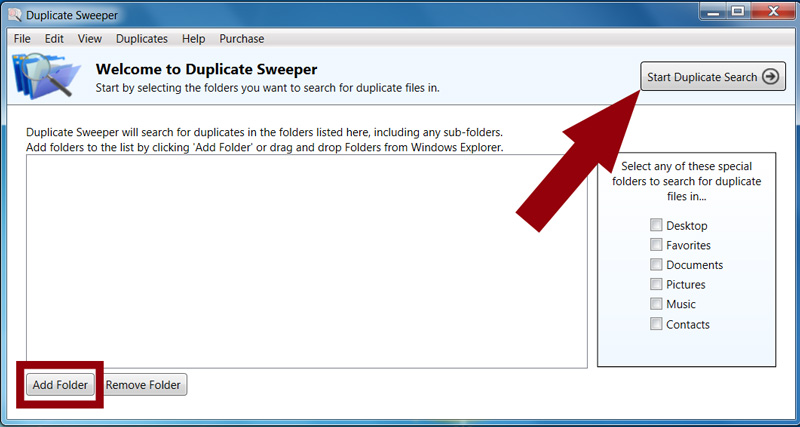
- Click "Add Folder" and select the folders on your external hard drive that you wish to search for duplicates.
- Once all the required folders have been added, click "Start Duplicate Search".
- Use the automatic duplicate selection tools, or manually select the duplicates you want to remove.
- Click "Recycle Duplicates" to move your selected files to your designated folder.

Removing duplicates from an External or Network drive
Please note that Duplicate Sweeper will not remove duplicates from external/network drives if the removal location is set to the Recycle Bin within Duplicate Sweeper's Preferences.
Go to Edit > Preferences > Removing Duplicates in Duplicate Sweeper and choose a location on the drive the files are being searched on.
When removing duplicates, the removed files will then be moved to the chosen folder on the drive. You can then either manually delete the folder containing the removed files, or recover any files should you wish.
Further Information
To search folders and files from your external hard drive for duplicates, open Duplicate Sweeper and click "Add Folder" at the bottom of the Welcome screen. Browse for a folder on your external hard drive that you'd like to perform a duplicate search on.
Select the folder on your external hard drive that you wish to sweep for duplicates and click "Start Duplicate Search".
Duplicate Sweeper will search your folders for duplicate files and list any duplicates that it finds under the "Duplicate Groups" column header. Each duplicate group will have a total number of duplicates, please see the number in the grey box in the screenshot below.
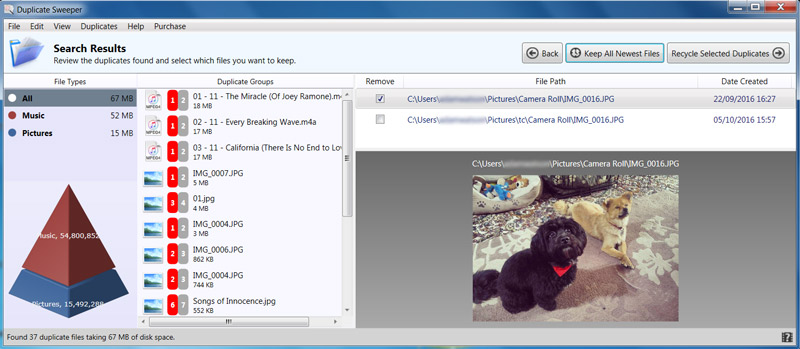
You can then manually select each duplicate group, and tick the duplicate files which you would like to remove. Alternatively, you can allow Duplicate Sweeper to automatically select which duplicate files to remove by selecting either "Keep Newest Files" or "Keep Oldest Files" from the Duplicates dropdown menu. Once you're happy with your selections, please click "Recycle Selected Duplicates". Duplicate Sweeper will display a screen showing you the duplicate files it will remove as below.
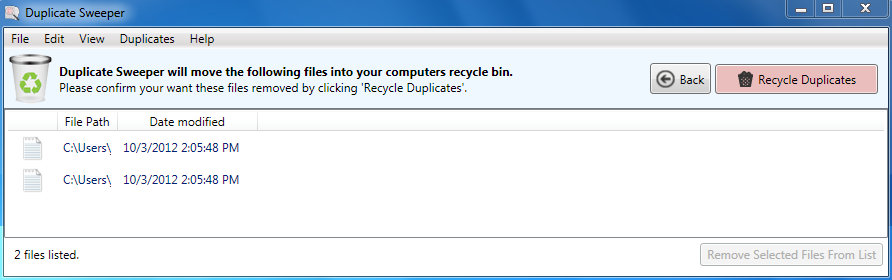
From here, you can review files which will be removed by Duplicate Sweeper and to confirm the removal, please click "Recycle Duplicates"
For more details on how to use Duplicate Sweeper please see the Duplicate Sweeper User guide.
Popular FAQs
- How to Activate Duplicate Sweeper
- Delete Duplicate Photos on Windows 10 and Windows 11
- How do I Remove Duplicate Files using Duplicate Sweeper?
- Duplicate Sweeper is not Removing my Duplicate Files
- How to Remove Duplicate Files from Google Drive?
- How to Remove Duplicate Photos from OneDrive
- How to Delete Duplicate Photos in Google Photos
- How to Remove Duplicate Files from iCloud Drive
- What are the Free Trial Limitations of Duplicate Sweeper?
- I have Forgotten my License Password