Looking through and Selecting Duplicates for Removal:
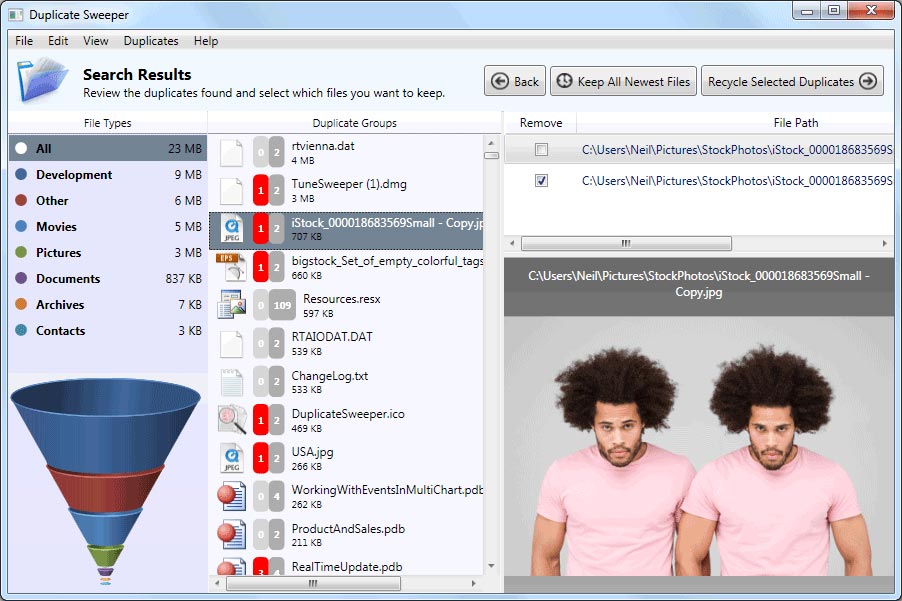
On the left hand side of the screenshot below is a summary of the types of duplicate files found. You can view duplicate files of a particular type by simply selecting the file type from the list. Clicking on Pictures in Duplicate Sweeper will display duplicate images. Similarly, you can click on Documents just to view duplicate document files and so on with other file types.
Duplicate Sweeper shows you your duplicate files grouped in Duplicate Groups in the middle of pane of the program. Each duplicate group contains files that are the same. The file list on the right shows all the files that are part of the selected group. You can preview the content of these duplicate files from within Duplicate Sweeper.
To select which of the duplicate files you wish to remove check the Remove box in Duplicate Sweeper. You'll notice that a red number appears next to the corresponding Duplicate Group.
The red number shows how many files in that group have been marked for removal. The grey number to the right of it shows how many files are in that duplicate group. You can remove your duplicates by clicking on Recycle Selected Duplicates in Duplicate Sweeper.
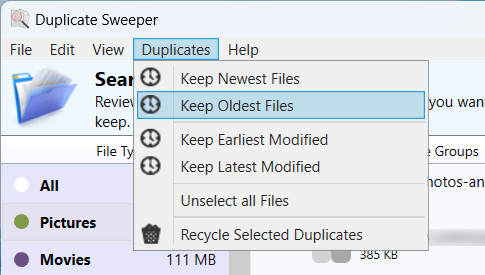
To speed things up. Duplicate Sweeper lets you automatically choose the duplicate files to remove. Right-click on the duplicate files to bring up a context menu, or if you prefer, click on the Duplicates tab on the menu bar, to display more options. From here you can select to Keep Newest Files and every file except the newest is marked for removal.
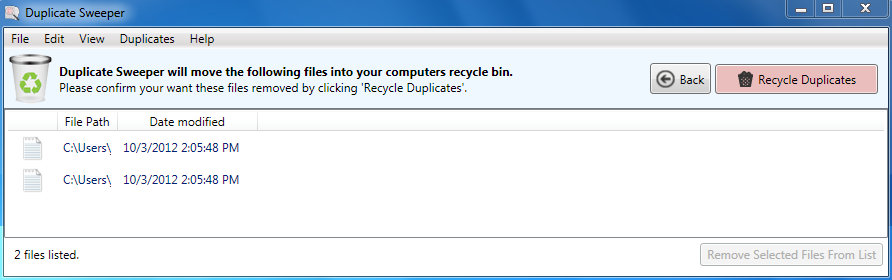
Once you are satisfied with your selection, proceed to click on Recycle Selected Duplicates.
You will be asked to confirm if you do want to recycle, and be given a list of all the affected files.
Confirm to proceed to recycle all of the Duplicates.
Don't forget that you can, at any time, return to the previous windows to make further changes to any parameters. Furthermore, the files you recycled will remain in the Recycle Bin (PC) or Trash (Mac) until you choose to empty it, should you happen to change your mind.
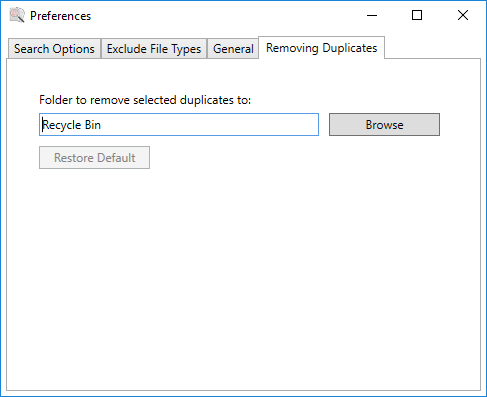
Changing the folder Duplicate Sweeper recycles your duplicates to:
By default, Duplicate Sweeper will recycle your Duplicates to Recycle Bin (PC) or Trash (Mac). If you would prefer to send your chosen duplicates to a designated folder, you can change this by selecting Edit > Preferences in Duplicate Sweeper. More info on Duplicate Sweeper Preferences here.
Restoring deleted files to the original location:
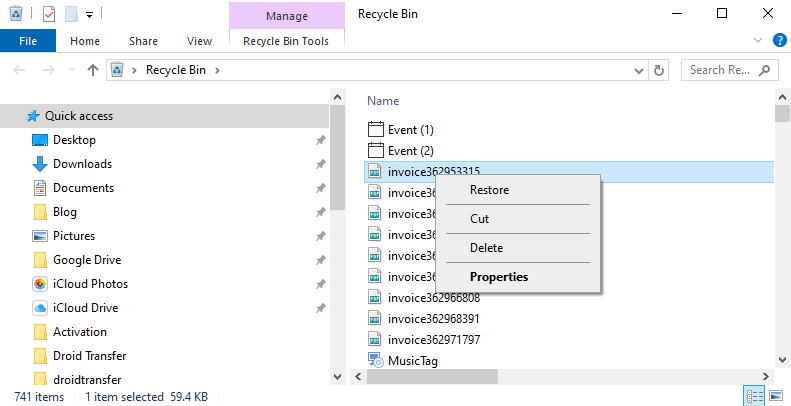
If you change your mind regarding the duplicate files Duplicate Sweeper has deleted, you can recover files from your Recycle Bin or Trash back to their original location. To do so, select the items you wish to recover, right click on them and choose Restore. You can Shift+Click on items in your Recycle Bin to restore multiple files back to their original location. If you're on a Mac, open your Trash, select Edit > Undo Move (Command-Z) and the deleted files will be returned to their previous file locations.
We use cookies to provide you the best experience on our website. To find out more, read our cookie policy. You may decline non-essential cookies if you prefer.
We use cookies to track usage and optimize your experience.